
Applies to: DT41Y/DT61Y/DT81Y/DN41R/DN61R/DN81R/DT41GB/DT81GB/DT61GB/DT41DB/DT81DB/DT61EQ/DW41JD/DW81KD/DW61LD/DT81DP/S500/S300/FC200
By default, the Setup Wizard starts once the device has loaded.
Operating the Setup Wizard:
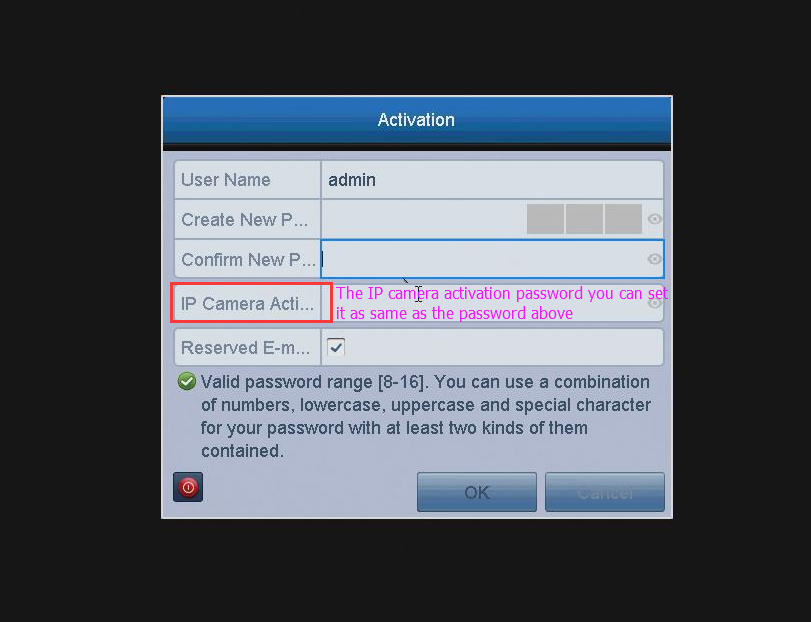
1. Activation: Create a password to activate the system.
2. For the first time to set up the system, please leave the settings of Singal Input Status by default.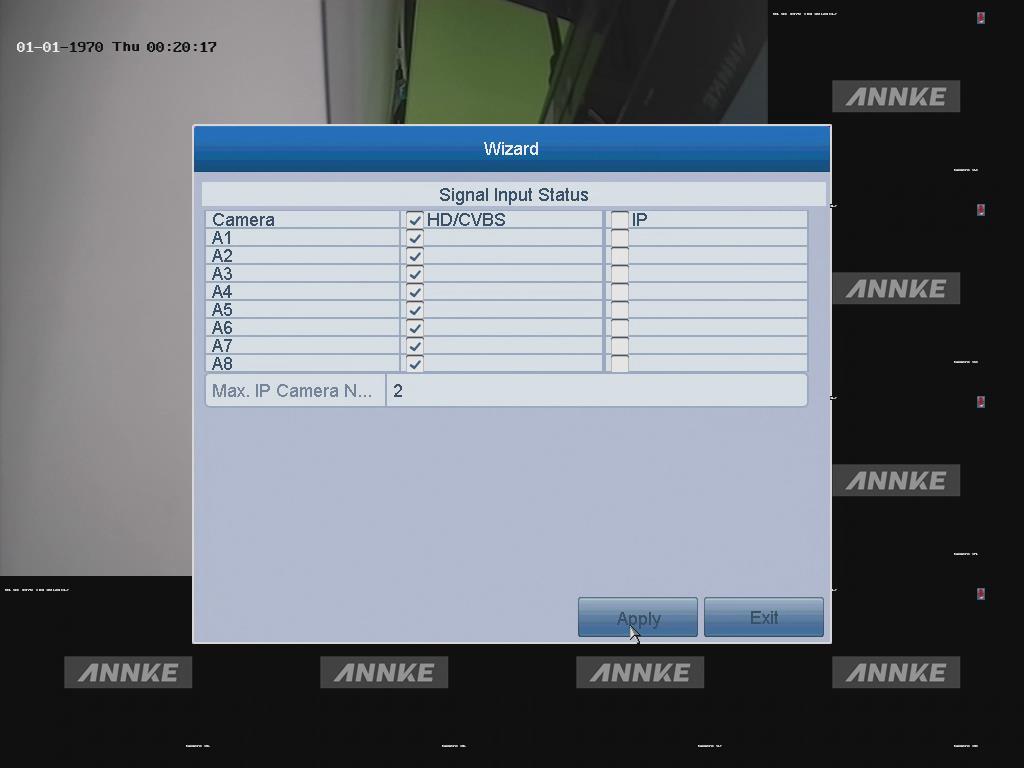
3. Choose the system language.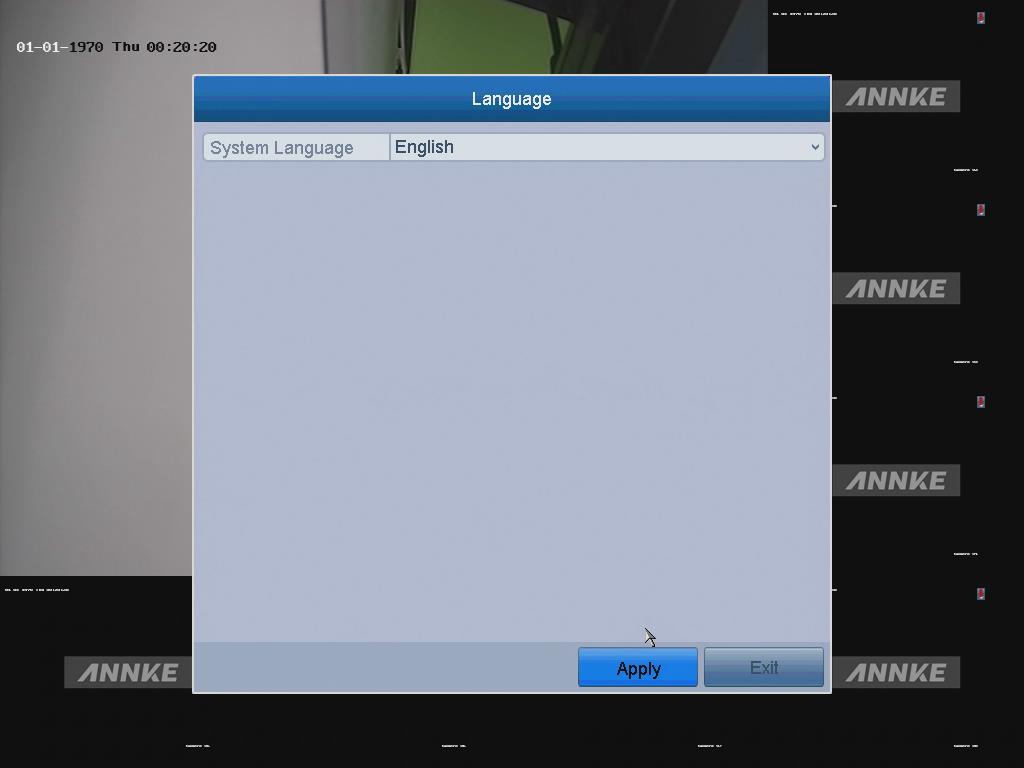
4. Free to choose the option "Start wizard when the device starts?”.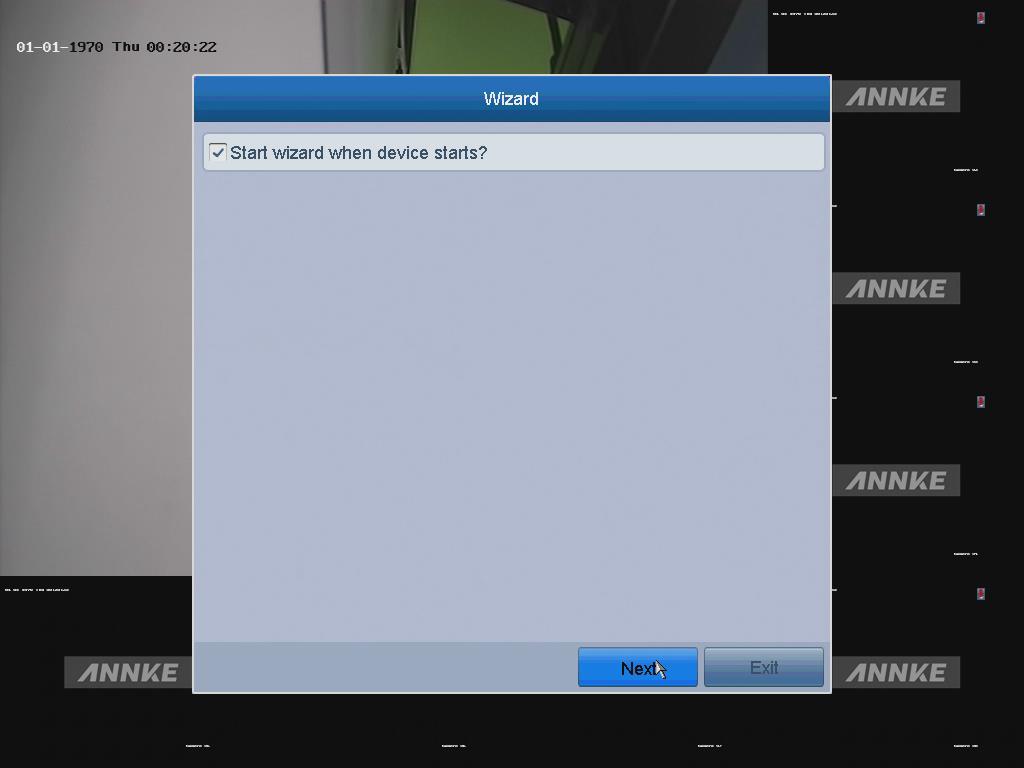
Note:
The Start Wizard can walk you through some important settings of the device.
If you don’t want to use the Start Wizard every time when the system runs, uncheck the option.
The Start Wizard can walk you through some important settings of the device.
If you don’t want to use the Start Wizard every time when the system runs, uncheck the option.
5. Click Next to enter the date and time settings window.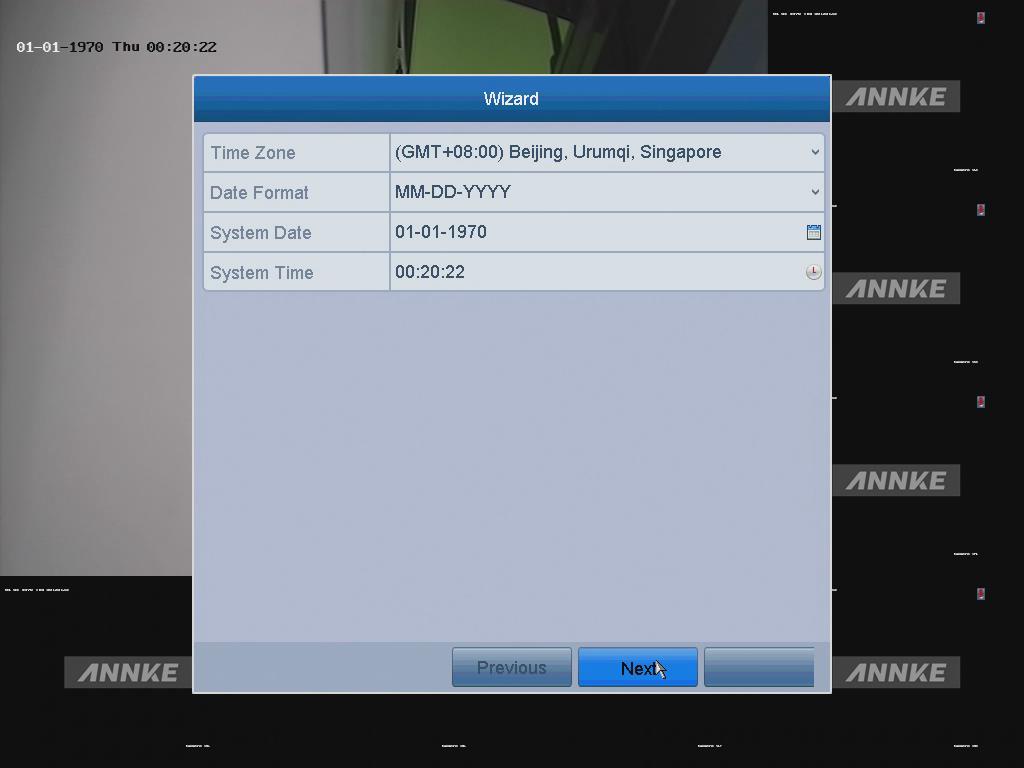
6. Click Next button after the time settings. Then enter the General Network Setup Wizard window.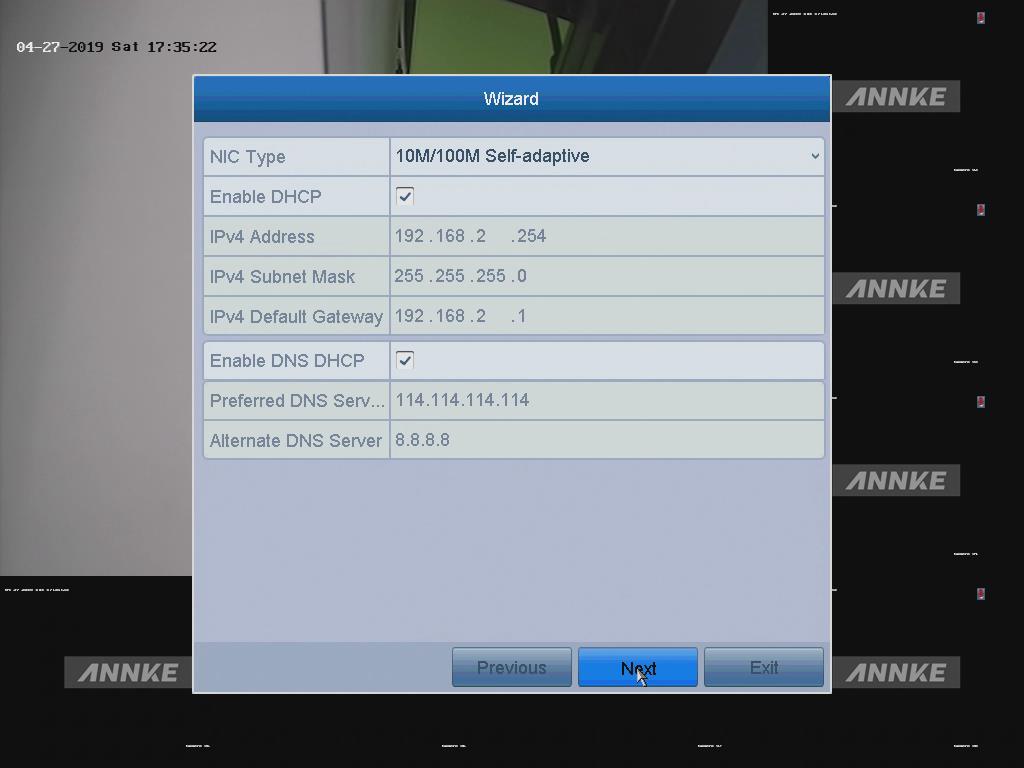
7. Click the Next button after you configured the basic network parameters. Then enter the Cloud P2P interface. Check the “Enable" button and create the verification code if you want to view your system via the phone or the internet.
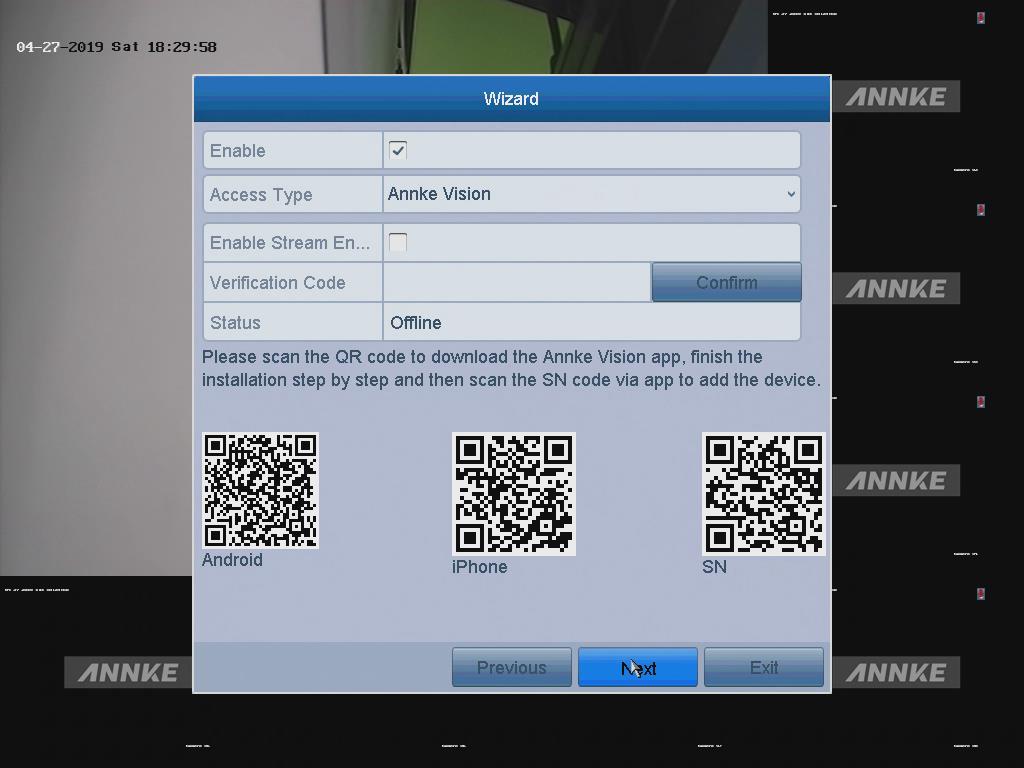
Note: Configure the Cloud P2P according to your need
8. Click the Next button to enter the Advanced Network Parameter interface.
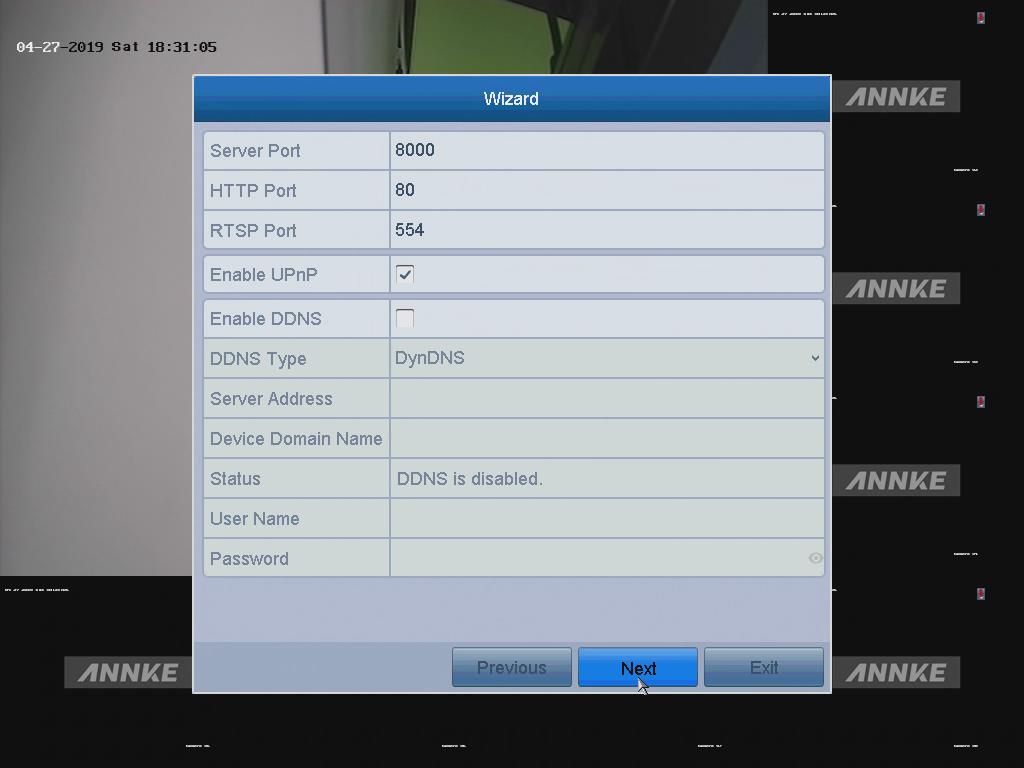
Note: You can enable PPPoE, enable DDNS and set other ports according to your needs.
9. Click the Next button after configuring the advanced network parameters, then go to the HDD Management window.
10. To initialize the HDD, click the Init button.
Note: Initialization will remove all the data saved in the HDD.
11. Click Next to enter the IP Camera Management window.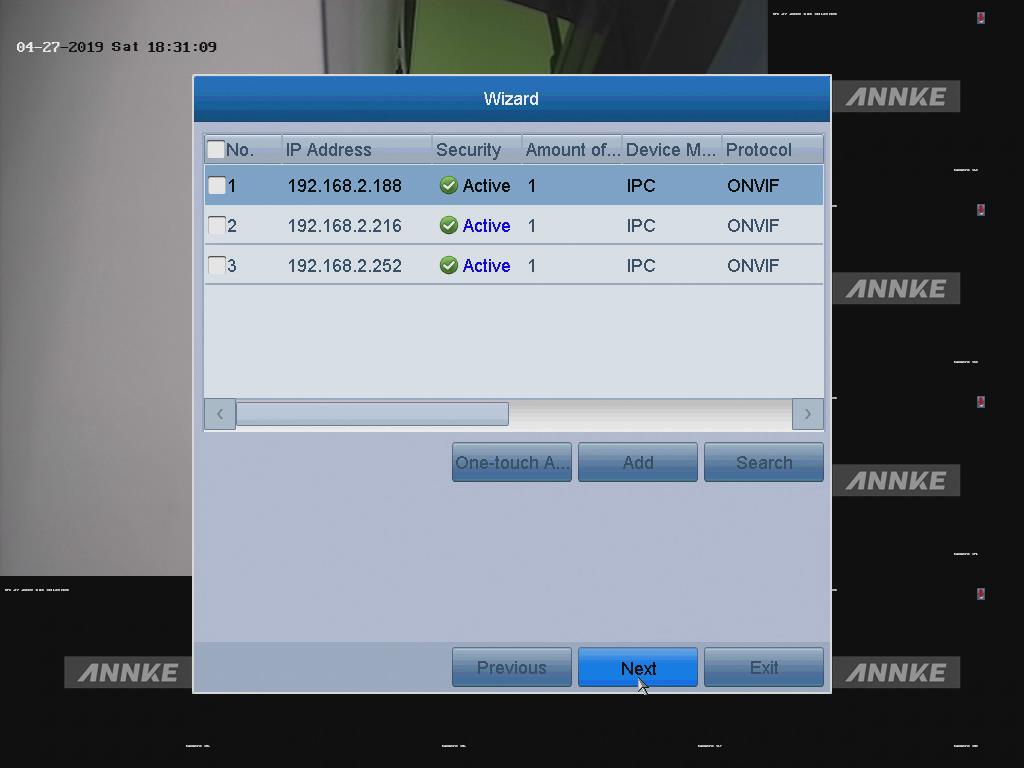
12. Add the IP camera. (If you got the external IP cameras to add into the DVR)
(1) Click Search to search the online IP Camera.
(2) Click Add to add the camera.
12. Add the IP camera. (If you got the external IP cameras to add into the DVR)
(1) Click Search to search the online IP Camera.
(2) Click Add to add the camera.
13. Click Next button after finishing IP Camera settings, then enter the Record Settings window.
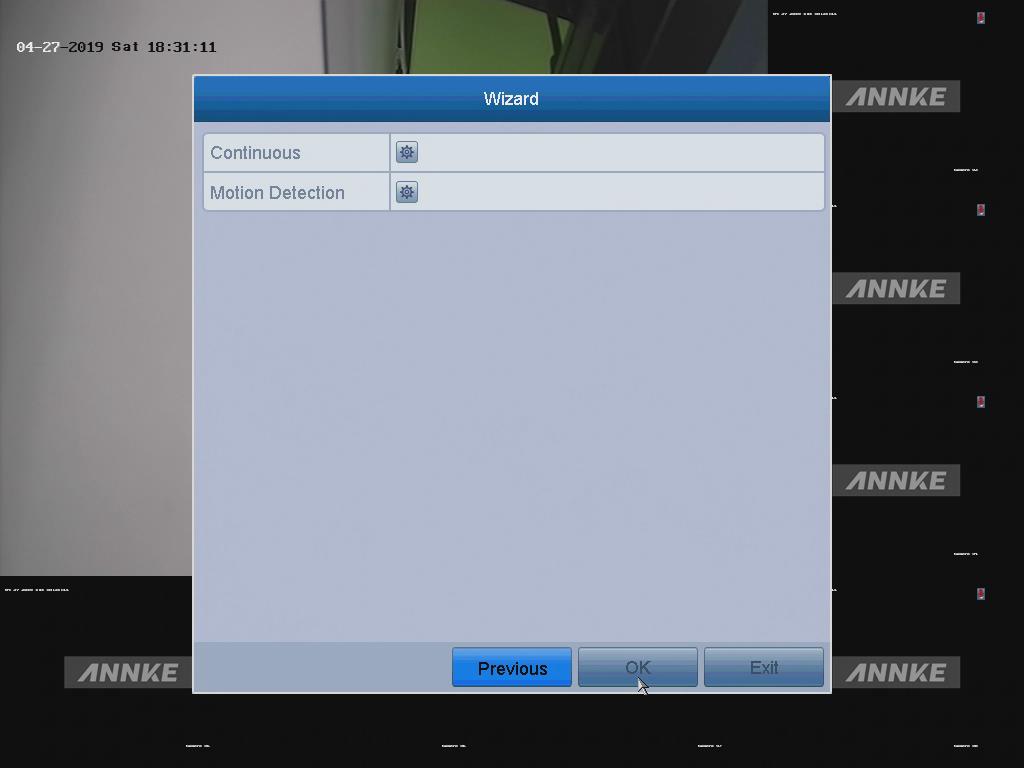
14. Click
 , and you can enable the Continuous recording or Motion Detection recording for all channels of the device.
15. Click OK to complete the wizard settings.
Comments
0 comments
Article is closed for comments.