
Applies to: N48PI/N44PI/N46PI/N44PAM/N48PAW/N46PCK/N88PCH/N441Y/N481Y/NCK800/H800/H500
By default, the Setup Wizard starts once the device has loaded.
Operating the Setup Wizard:
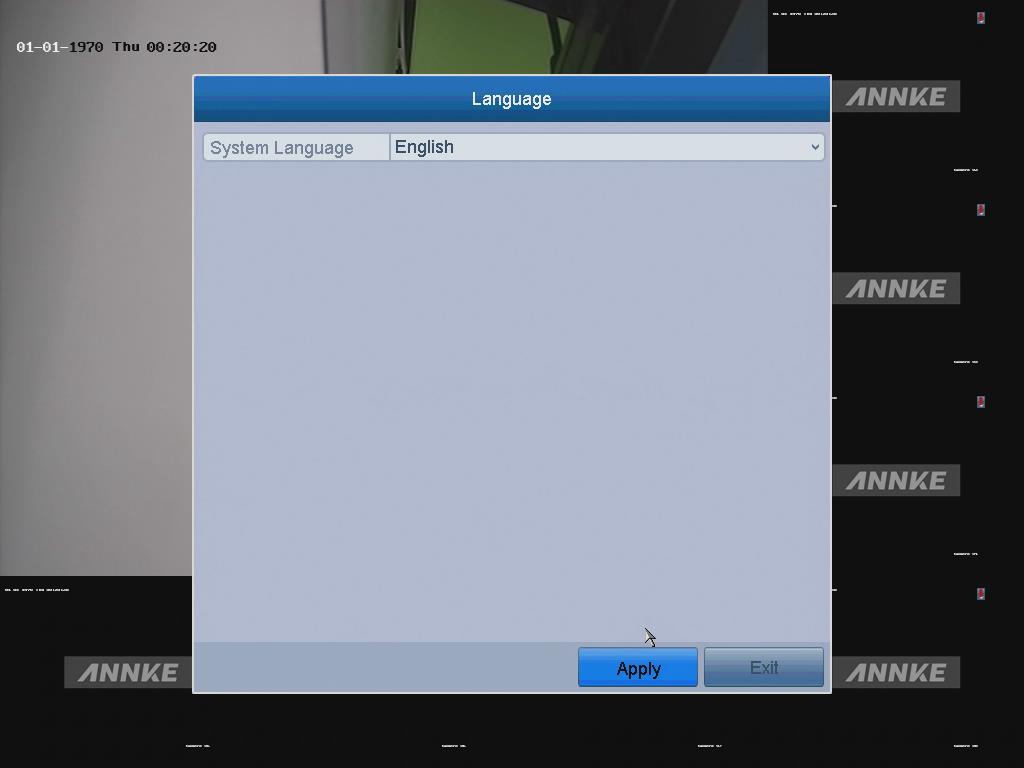
- Select the system language from the drop-down menu.
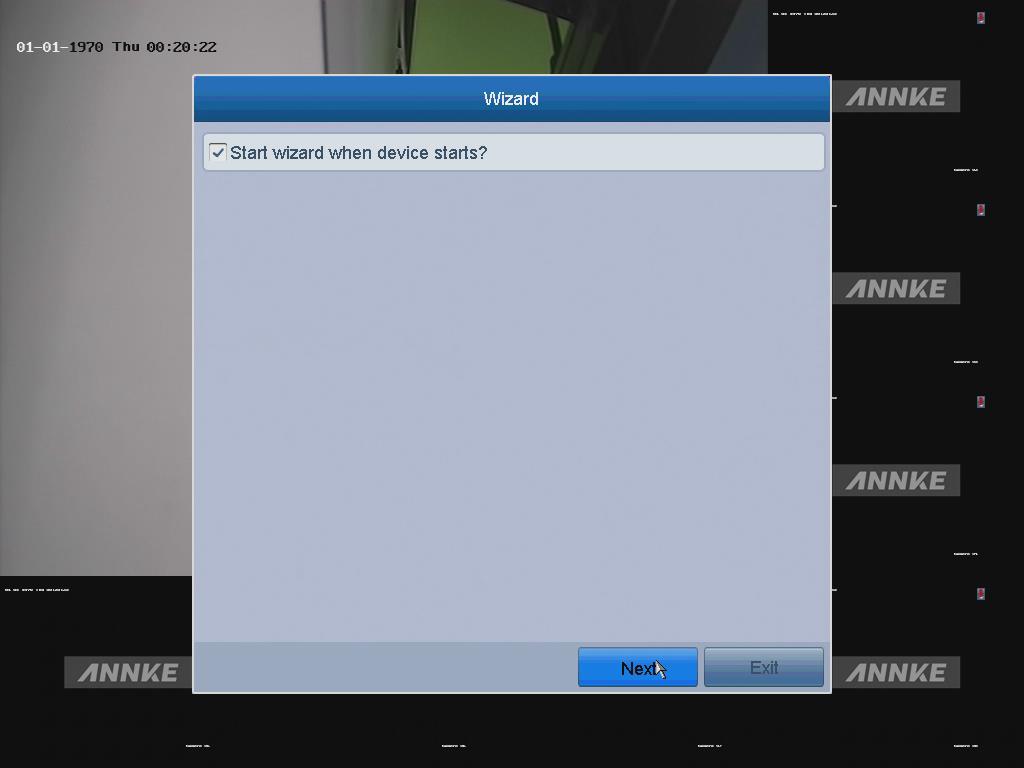
- Free to choose the “Start wizard when the device starts?” .
Note:
The Setup Wizard can walk you through some important settings of the NVR.
If you don't want to use the Setup Wizard at that moment, uncheck the button. Or you can also check it to use the Setup Wizard. - Click Next to enter the date and time settings window.
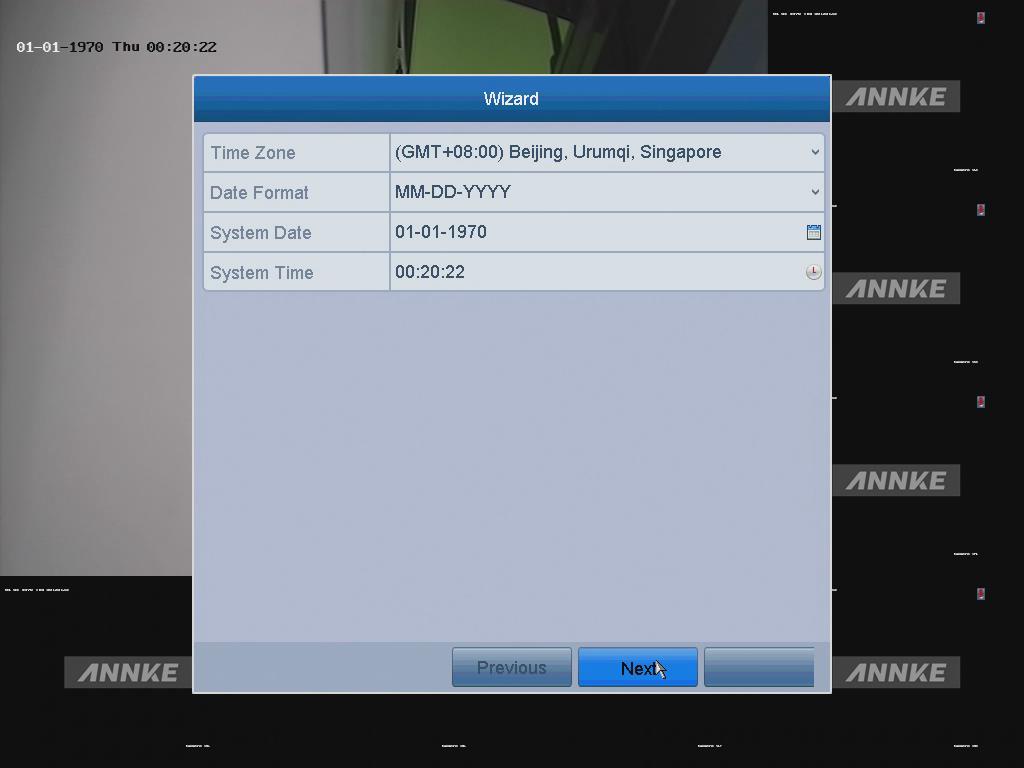
- Click the Next button after the time settings. Then enter the General Network Setup Wizard window.
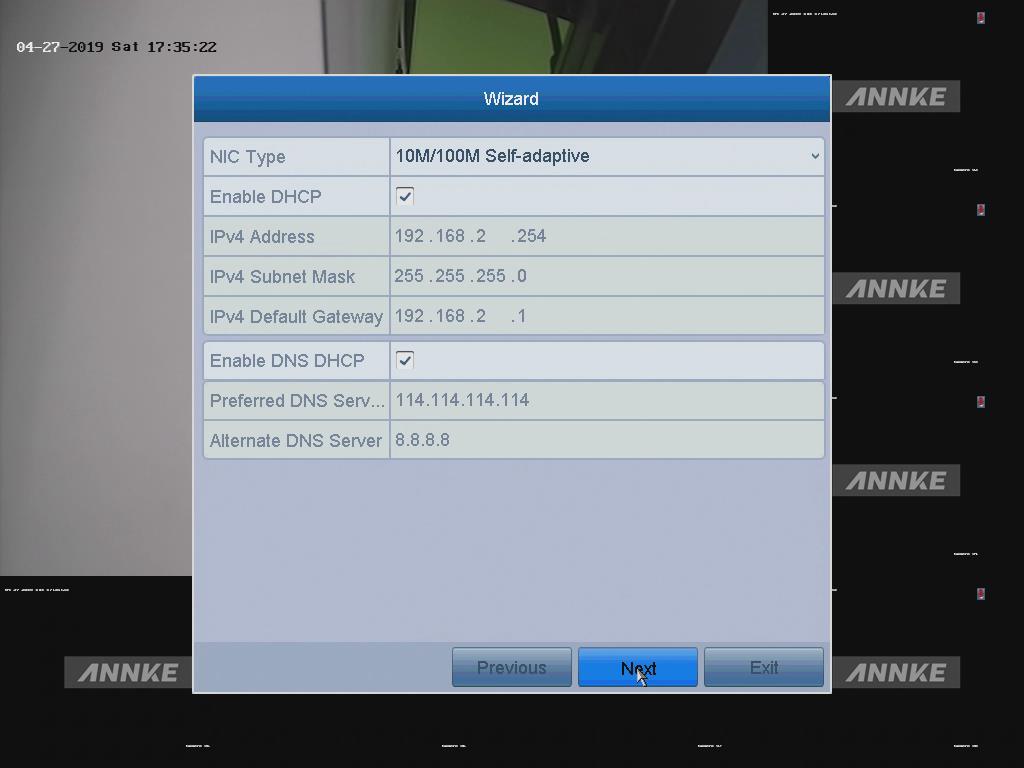
Note: For the models which have the PoE or built-in switch network interfaces, including N44PI, N48PI series NVR, the Internal NIC IPv4 Address should be configured for the cameras connecting to the PoE or built-in switch network interface of the NVR. - Click the Next button after configuring the advanced network parameters, then enter to the HDD Management window.

- To initialize the HDD, click the Init button.
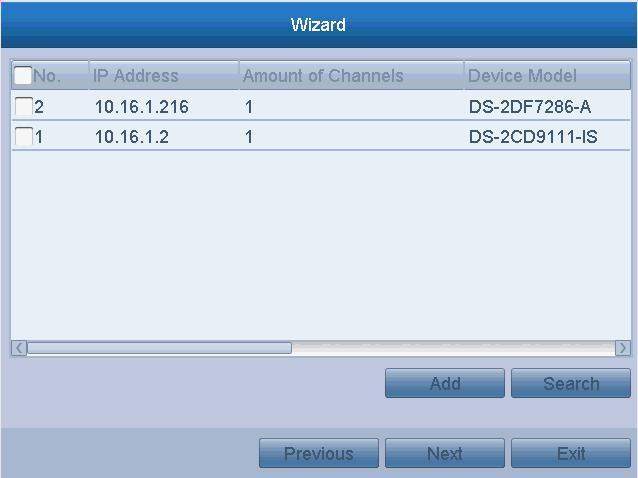
Note: Initialization will remove all the data saved in the HDD. - Click the Next button. You will enter the Adding IP Camera interface.
- Click Search to find an online IP Camera. Select the IP camera to be added and click the Add button.
- Click the Next button. Configure the recording for the searched IP Cameras.
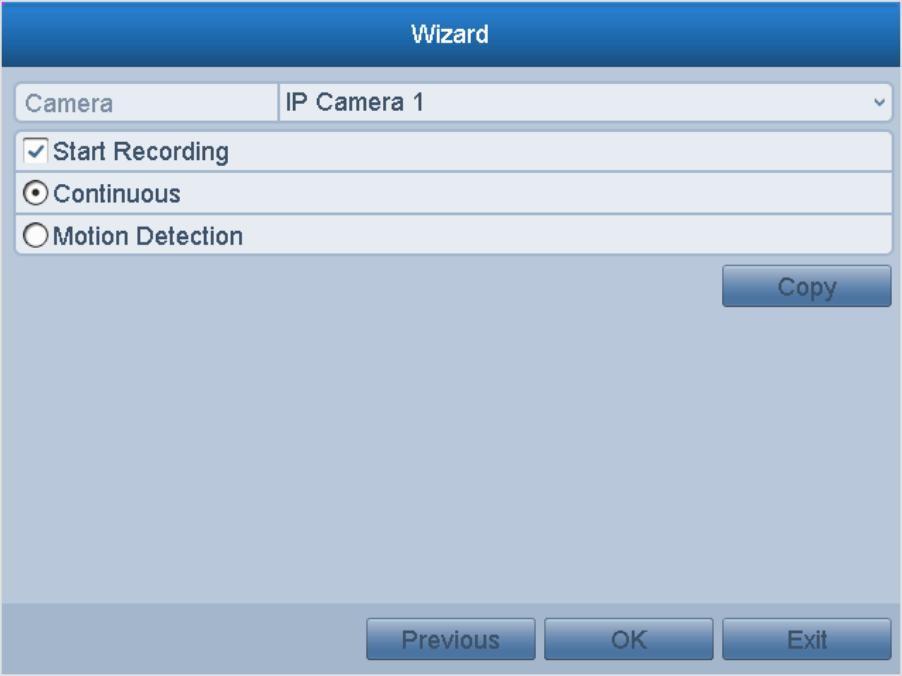
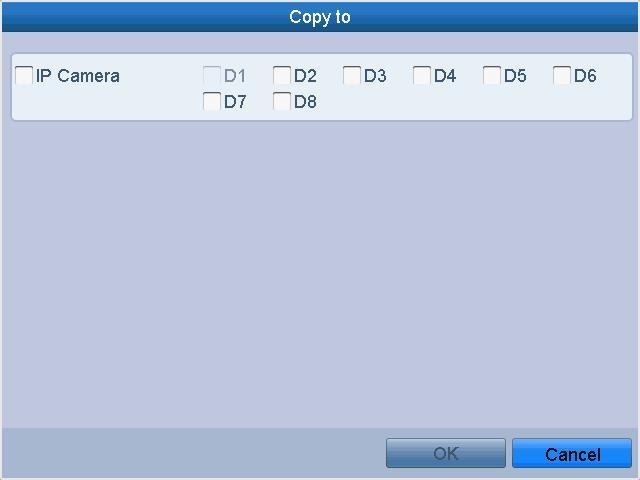
- Click Copy to copy the settings to other channels.
- Click OK to complete the startup Setup Wizard.
Comments
0 comments
Article is closed for comments.